
When I acquired Truce she didn’t have a fridge on board. The previous owners liked simplicity on board and didn’t go for ‘fancy’ systems. The top opening icebox on board was very well insulated, ice would keep for several days.

I went along with the icebox idea for a long time. However, Ngozi convinced me that we needed a fridge onboard, after all, you can’t drink warm bubbly can you? In fact, I was becoming disenchanted with drinking tepid beer in summer, so I didn’t need too much nagging to get me motivated for the fridge project.
The plan was to convert the existing icebox to a fridge. A few sessions on Google convinced me it was something that even I could manage. So, in the winter of 2020 I set to work obtaining the bits to make it work.
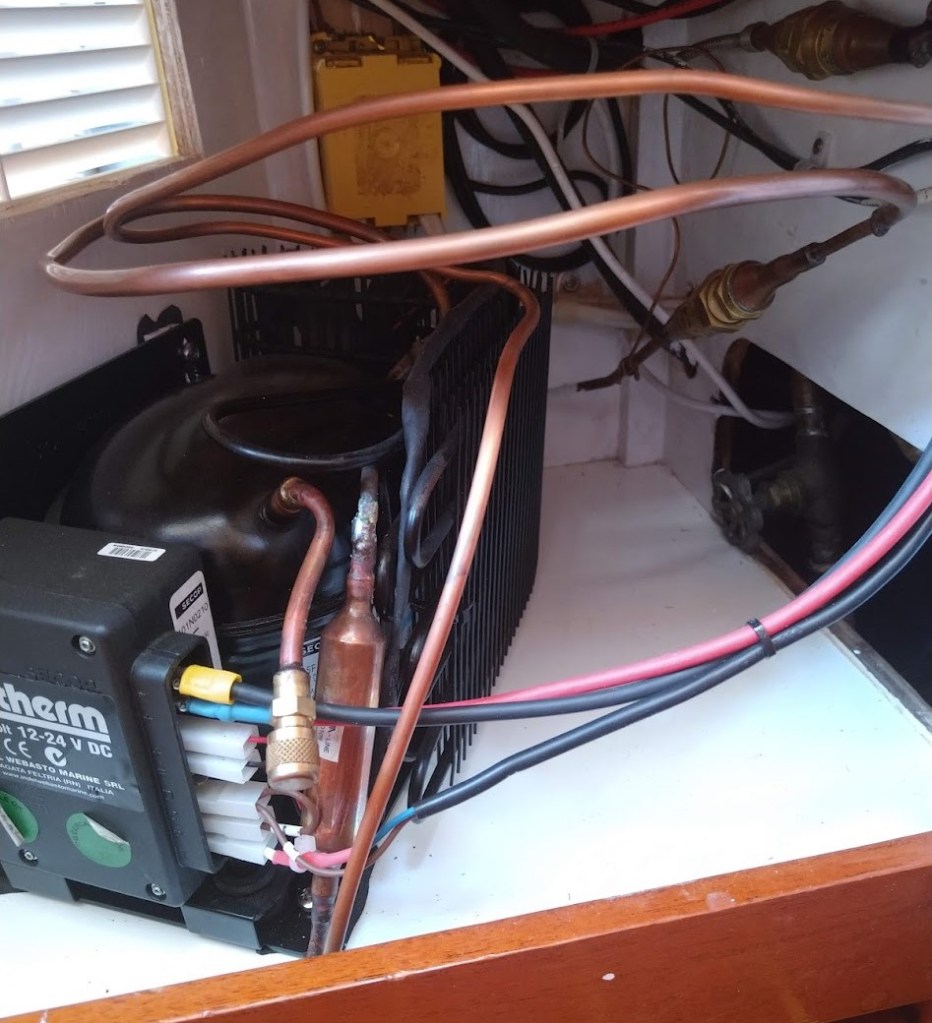
The icebox is just over 50 Litres capacity, quite small. The unit to make it work was the Isotherm series 80 air cooled compressor/condenser. I purchased the Isotherm compressor from Fridgetech in Auckland for a reasonable price. The unit is virtually plug and play but I still read the instructions a couple of times before opening or cutting anything.
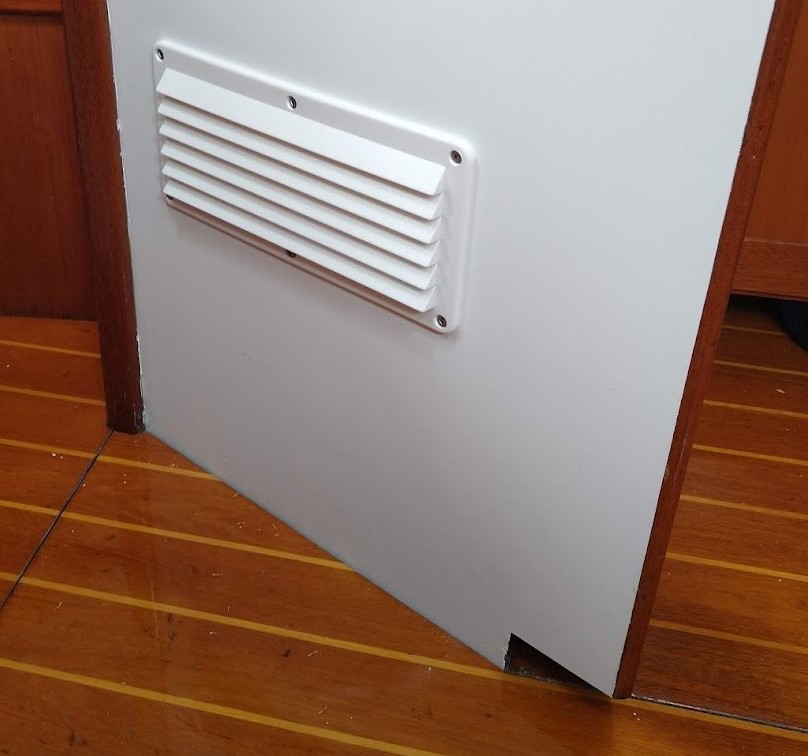
It turned out to be a straightforward job. I placed the compressor unit into the bottom shelf of a food locker in the Galley. This location had the advantage of being open to the bilge where I hoped the cool air could flow up and provide some cooling effect for the compressor. Into the side of the locker I installed a vent to allow the warm air to escape from the compartment.
Then came the harder bit of installing the evaporator plate into the ice box. I drilled a hole into the side of the ice box with a hole saw and threaded the piping through. Screwing the evaporator plate into place in the ice box was awkward, it’s a small space in an awkward location and my elbows only hinge in one direction. After a few choice words of encouragement, it was done.

The compressor unit mounts into a frame arrangement. First screw down the frame and then click the compressor into place. That bit was easy, the compressor mounts on rubber dampers to reduce vibration and noise, nice. This frame idea is good as its would have been more difficult to mount the compressor as one piece. Also, it allows the compressor to be removed easily if needed without removing and fixings.
The next item was to connect the quick couplings between the compressor and the evaporator plate. This is also an easy job, just mate the two ends together and screw them up to the correct torque. There was a momentary hiss of gas as the couplings went together (a bit disconcerting) but no leaks afterwards.
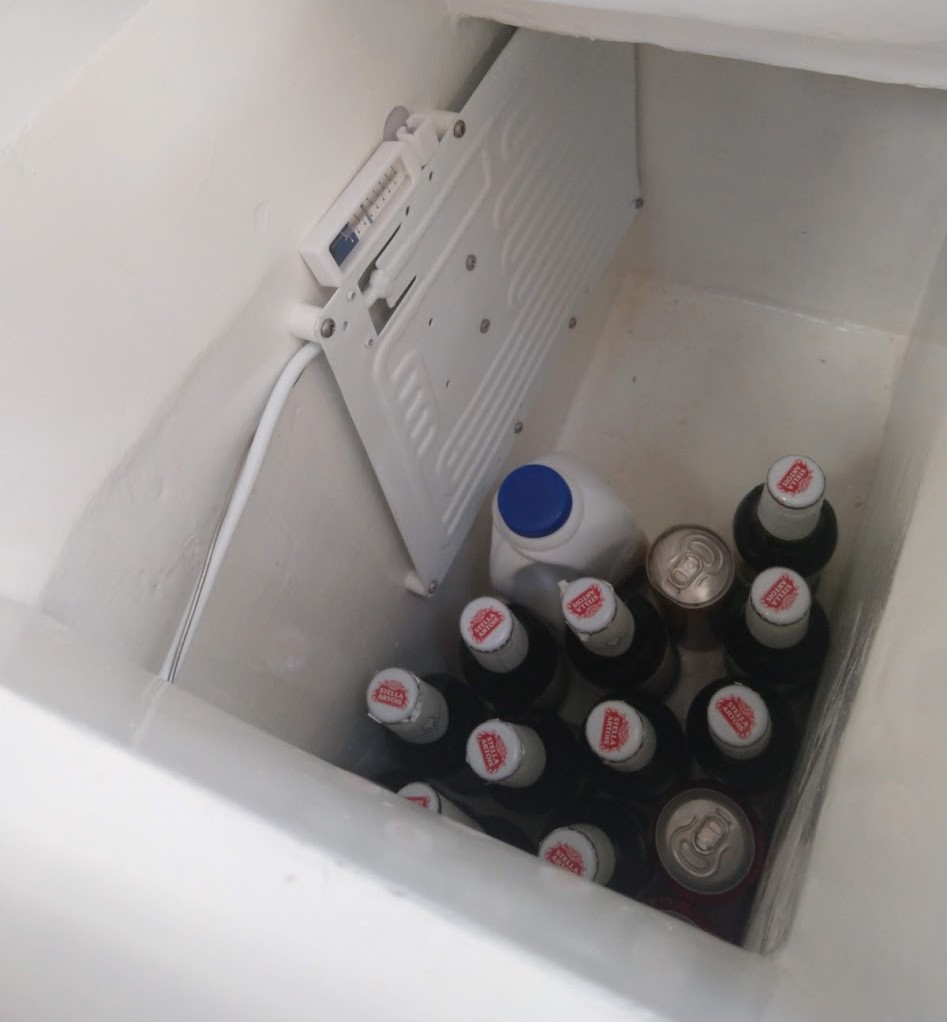
I sealed up the pipe entry hole into the icebox with expanding foam from a can. (Very good stuff to have on board for emergency use as well). The installation looked good. I placed the thermostat at the top of the locker where it is visible and easy to adjust.
Next, I wired up some cables from the buss bar through a switch to the compressor via a fuse, that bit was also easy Then I connected the electrical connections up and applied power. All seemed to be OK. Then I turned on the thermostat and after a couple of seconds the compressor kicked into life. A few minutes later I checked the evaporator plate, it was cold. Bingo, all working.
Eager to test further I loaded a few drinks into the fridge and closed the lid. The compressor unit cycled on and off, just about 50% on and 50% off. This should not happen so I called up Fridgetech for advice. They advised me to let it run overnight and it should settle down, so I left it running and went home.
The next day I returned to the boat. The fridge was down to temperature, in fact a bit too cold and the on off cycle was down to about six times per hour, just as it should be.
I have now been running the fridge for many months and not had any problems. The thermostat is set on the lowest setting and the fridge contents keep gloriously cold. The noise level from the compressor is negligible and not at all intrusive, you can only really hear it if you are listening for it when at anchor.
The power consumption is also quite low, although not quite as low as the makers claim. In use I find the unit draws 7 amps momentarily on start up then settles at about 6 amps. This equates to around 0,7 Ah which is reasonable and still less that 24 amps per day, easily handled by the solar panels most days. There have been a few days when continuous rain and cloud has reduced solar input when I have had to either run the engine or shut the fridge off for a while, but these are rare.
All up I am very pleased with the installation, its quiet and trouble free. The temperature and efficiency are good. The cost was less than buying and installing an off the shelf fridge and the room lost to the compressor unit is small. The end result, we have the luxury of cold beer for me and bubbles for her.

Discover more from The Adventures of Captain Ray Penson
Subscribe to get the latest posts sent to your email.

Loving the detail. But where is the photograph of Ngozi enjoying said bubbles? 🥂 Margy in Melbourne
LikeLike
Hi Margy, there is a photo of Ngozi now, just for you:)
LikeLike
We need a new fridge on HONEY. Can you complete the installation for us in Alicante 😄
LikeLike
Can you wait?
LikeLike