23 July 2023
The idea of making fresh water from seawater on the boat is very appealing and adds another level of independence to cruising. But such a luxury comes at a cost – money, space, added complexity and power. Being mainly single handed with a small yacht my freshwater requirements are modest, most off the shelf water makers didn’t fit with my needs. So, I thought why not look at making one to fit the boat and my expectations.
My basic requirement were: –
- Run on 12 Volt DC from existing on-board house batteries
- Output volume around 15 Litres per hour
- Space efficient and modular
- Simplicity of use and maintenance
Water makers are quite simple devices that use pressure to force sea water through a membrane to separate out fresh water through a process called Reverse Osmosis. The heart of the system is a pressure pump, working around 800 PSI. On most off the shelf water makers these pumps are usually electrical AC driven or belt / mechanically driven from the boat’s engine. I discounted the AC pump option for two reasons. Firstly, they had a high output and secondly, I can’t fit a large inverter to convert DC from the house batteries to AC current. The engine driven option was not suitable due to lack of space and additional engineering complication. I also want to operate the water maker at anchor or sailing with the engine shut down.
The pressure pump is the key component, by going for a 12 volt DC pump my pump options seemed very limited. Luckily, I found a suitable pressure pump from a company called PumpTec in America. The pump is designed for misting operations but has the capacity to supply a small water maker and can operate up to 1000 PSI. The guys at PumpTec were helpful and confirmed that the pump had been used previously in reverse osmosis water makers with success.
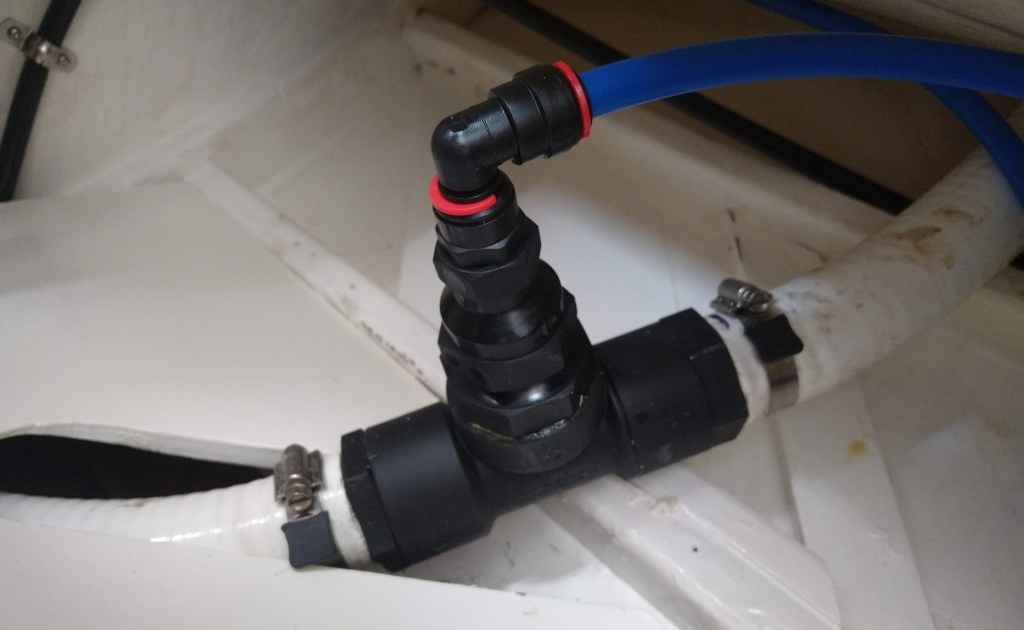
With the pump issue solved I set about organising a parts list and schematic drawings. Once I had figured out what I needed the process of procurement started. As to layout, I decided to use some space in the bosuns locker where a hot water heater had previously been installed.
The existing seawater inlet was used for the water supply, the same supply that is also used for the deck wash pump. A small boost pump was added into the deck wash line to boost pressure to the high-pressure pump. This arrangement will allow the deck wash pump to act as a boost pump in the event of a failure of the small pump. An isolating valve separates the water maker from the deck wash when in use. The brine water drains into the cockpit and goes down the cockpit drain, no need for another through hull fitting.
For the pre filters I used an RV dual filter housing and filters were sourced from a local hardware store. The piping for the system is a mix of John Guest click fit, 13mm water hose and 10mm clear hose and the high-pressure side is custom made hose and fittings.
I found it convenient to mount the HP pump and membrane housing on a backing board that I screw onto the bulkhead of the bosuns locker. The supports for the membrane housing are drain pile supports from the hardware store. The pressure gauge, needle valve and other high-pressure bits were sourced from Amazon. The high-pressure piping and end fittings were made up locally by a firm specialising in high pressure fittings.
Below are some photos of the project and installation.


The schematic drawing went through many revisions as I altered and fine tuned the installation. The final drawing is as shown below.

For a budget I aimed to complete the installation for NZ$2,500. Unfortunately, the project went over budget for a couple of reasons. The first being the sharp increase in prices from the time of first planning to actually purchasing the equipment, post covid inflation. The second was sourcing the membrane and housing from Australia and having high pressure hoses made up locally. In both these areas I could have saved considerable money by purchasing from China but as time was running out, I could not afford any doubts about delivery or quality, it had to work out of the box.
The main costs are shown below in New Zealand dollars: –
High Pressure pump $804
2521 Membrane and housing $990
Needle valve $23
Pressure Guage $13
Stainless HP fittings $406
Filters $41
Electrical cable and fittings $25
High pressure hose and fittings $576
Plumbing fittings $120
The total cost of everything including the board, paint, numerous additional screws, fastenings and hundreds of miscellaneous bits came to NZ$3,164.
Operating the water maker for the first time was heart in mouth, would it work? I double checked and then triple checked everything before starting it up. First the boost pump to fill the pre filters, that worked Ok and I purged the air from the filter housing. Then I switched on the pressure pump, yes water was flowing from the outlet into the cockpit. After a few minutes I started to slowly close the needle valve to increase the pressure. As I increased the pressure at 700psi the first product water started to appear in the sample hose. By the time I had increase to 800psi there was a steady trickle of water. After a few minutes I took a reading with the TDS meter – 300. A few minutes later it had dropped to 220. Then a reading of 200. Bingo, we were making fresh water, The satisfaction of producing fresh water from seawater was immense. I even tasted it and drank some, I don’t usually drink water. Even today, after producing many litres of water I still get satisfaction from the process.
A few days ago I made forty litres of water in the morning when at anchor and by late afternoon the batteries were back at 100% capacity from the solar panels. Being able to make fresh water just from solar power is amazing.
The output from the water maker is approx. 15 – 18 Litres per hour
Power consumption is about 15 amps
Water quality is between 180 and 220 ppm (usually about 193)
Now that the water maker is operational and has been in use a few times is there anything I would change or improve? Yes, if possible, I would like an automatic needle valve that maintained the working pressure at 800psi. I have found that the needle valve is very sensitive and has to be monitored every few minutes to make sure the correct pressure is being maintained. Apart from that the water maker is easy to operate and produces good water quite economically, certainly sufficient to be self sufficient.

Thank you so much, this is exactly what I have been looking for.
So well thought out and discribed.
Thank you,
Regards Rachel.
LikeLike
thank you so much for the effort and time.
TURK
LikeLike
I love the internet and people that document things so painstakingly well. Thank you so much for the work you put into this. I am designing a system to harvest salt from seawater and this system is the lungs of my operation. Thank you so much!!!
LikeLiked by 1 person
Thank you so much!
This is exactly what we were looking for!
Do you have any new feedback or conclusions after two years? 🙂
Best regards, Theresa
LikeLike
Hi Theresa, Just a couple of things,
1. I would like to have an automatic pressure valve to set the membrane pressure. I have a needle valve that has to be monitored as the pressure tends to fluctuate. An automatic valve would be much easier, just set and forget.
2. Fresh water flushing. I use a hose into a plastic container for fresh water flushing, its a bit awkward. A plumbed in set up would be easier to use.
That’s about it, keep it simple.
LikeLike